Fermentation

Fermentation

Gluten-Free Sourdough Pizza

Ingredients

Instructions

  1. Combine the first 4 ingredients in a medium bowl and whisk quickly until a thick gel forms.

  2. Add salt and again mix until thoroughly combined.

  3. Add starter, and mix thoroughly.

  4. Next add the flour and stir until flour is well incorporated. Then add oil, stirring until combined.

  5. Cover and let ferment for approximately 4 hours at room temp (if your home is cold it may take up to 6 hours).

  6. After it is done fermenting it will be slightly puffed up but not double in size. Preheat oven to 500*f with a pizza stone, cast iron skillet, or baking pan in it.

  7. Gather two pieces of parchment paper big enough for your pizzas and divide the dough in two.

  8. Put one piece of dough on each of the parchment papers and with wet hands shape the dough into the pizza shape you desire, leaving a ridge for a crust.

  9. Once the pizza is shaped, use a fork to gently poke holes all over the flat (center) part of the crust.

  10. When the oven is preheated, carefully lift the parchment with crust on it, onto the pizza stone (I use a dinner plate to help with the transfer).

  11. Next, close the oven door most of the way and carefully use a spray bottle to spray water on the side of the oven wall to facilitate steam (this is what makes the crust rise) then quickly close the door the rest of the way.

  12. Turn the oven to High Broil for approximately 1 minute. Then turn it back to 500° F to finish baking.

  13. Bake for about 5-7 minutes or until finished rising but not all the way browned yet. Take out of the oven and top as desired.

  14. Put back in the oven to finish baking at 500° F for another 7-10 minutes or until the crust is browning and the cheese or toppings are bubbly.

  15. Repeat with other pizza!

Fermentation

Roasted Corn Miso

Roasted Corn in Pan

**Makes 1 Quart

Ingredients

  • 1.5 cups Roasted corn (we cut corn off the cob and roast on a sheet pan) 

  • 1/2 cup Raw corn 

  • 1 cup Koji 

  • 3 TBS Non-Iodized Salt 

  • Water to cover the mixture 

Instructions

  1. Once the corn and koji mixture is covered with water, put the lid on and then shake the jar well. Move to a cool/dark place to ferment. 

  2. Ferment for 5-10 days. 

  3. When the corn miso is active, foggy in color, and shows signs of bubbling, then move the mixture to the blender. Mix till a loose paste consistency. 

  4. Optional step: add jalapenos, garlic, thyme, red chilis, or other ingredients to the mixture. Blend a second time. Ferment for another 2-10 days.

Fermentation

Aged Miso Cheese

Ingredients

  • 2 cups raw, unsalted cashews

  • 1 cup filtered water

  • 1 tablespoon dark miso

  • 3 teaspoons unrefined sea salt, divided

  • ½ cup coconut oil

Instructions

  1. In a bowl, soak the cashews in water for 8-12 hours. Then drain. 

  2. Pour the cashews into a blender with the miso, and blend until they are combined. Cover and let sit for twenty-four hours. Add 1 teaspoon of the salt as well as the oil, and blend until smooth. You may need to push the ingredients down with a spatula a few times to ensure a creamy, smooth consistency.

  3. Pour the cheese mixture into a cheesecloth-lined bowl that is the shape you’d like the finished cheese to be. Refrigerate for four to six hours, or until it is firm. Remove the cheese from the bowl, and peel away the cheesecloth.

  4. Gently rub the remaining 2 teaspoons of salt over the full surface of the cheese, including the bottom. Carefully place it on a wire rack in a cool, dark, and undisturbed place, and allow the cheese to air-dry for seven to twenty-eight days, or longer if desired. After you have aged the cheese, refrigerate and serve, or store in a covered container in the refrigerator for up to one month.

Fermentation

Apple Cider Vinegar / Fruit Scrap Vinegars

Ingredients

  • 1 pound of fruit or fruit scraps 

  • ⅓ cup of sugar 

  • ½ cup apple cider vinegar

  • Cover with water 


Instructions

  1. Place everything in a glass jar and cover with tight-knit cheesecloth, muslin, an old t-shirt, or a hand towel and secure with a rubber band

  2. Mix once a day with a spoon or chopstick for one week to help the acetic acid to produce. Acetobactor-like air.

  3. Leave for 4 weeks to 3 months for the initial ferment.

Fermentation

Almond Gruyere Cheese

Ingredients

  • 2 cups raw, unsalted cashews

  • 1 cup filtered water

  • 1 tablespoon dark miso

  • 3 teaspoons unrefined sea salt, divided

  • ½ cup coconut oil


Instructions

  1. In a glass or ceramic bowl (with a lid), combine the cashews, water, and miso, and stir until they are combined. Cover and let sit for 24 hours.

  2. Pour the cultured cashews into a blender. Add 1 teaspoon of the salt and the ½ cup of coconut oil, and blend until smooth. You may need to push the ingredients down with a spatula a few times to ensure a creamy, smooth consistency.

  3. Pour the cheese mixture into a cheesecloth-lined bowl; a bowl that is the shape you’d like the finished cheese to be. Refrigerate for 4 to 6 hours, or until it is firm. Remove the cheese from the bowl, and peel away the cheesecloth.

  4. Gently rub the remaining 2 teaspoons of salt over the full surface of the cheese, including the bottom. Carefully place it on a wire rack in a cool, dark, and undisturbed place, and allow the cheese to air-dry for 7 to 28 days, or longer if desired.

  5. After you have aged the cheese, refrigerate and serve, or store in a covered container in the refrigerator for up to 1 month.

Fermentation

Milk Kefir (Dairy and Non-dairy)

Milk Kefir (Dairy)

Ingredients

  • 1 tablespoon kefir grains

  • 8–16 ounces of milk (Goat or Cow: Organic, Non-Homogenized, and Raw are best.)

Instructions

  1. Add 1 tablespoon of kefir grains to 8–16 ounces of raw milk in a jar with a lid. 

  2. Let it sit on the counter at room temperature for 24–72 hours depending on how sour you like it. You can taste it to check.

  3. Shake a couple of times a day to keep fresh nutrients available to the grains.

  4. Strain the milk so you can keep the kefir grains to make a new batch.

  5. Put the strained kefir in a jar with a tight lid and keep it out of the fridge for a few hours. This will increase fizziness.

**NOTES: The grains multiply. You can share them with friends or keep growing more. They work better if you keep them outside of the fridge. If you need to take time off from kefir, you can place them in some fresh milk and then put them in the fridge indefinitely. Once you are ready to use them again, rinse them off and begin the process from the beginning.

Milk Kefir (Non-dairy)

Ingredients

  • 1 Tablespoon kefir grains

  • 8–16 ounces of full-fat canned coconut milk or you can get young Thai coconuts and use the water and scrape the pulp and blend to make your own coconut milk.

Instructions

Use the same recipe for the original milk kefir; just replace the dairy with coconut milk. 

**NOTE: Make sure to put the grains in dairy milk every 2–3 batches to keep them happy and healthy.

Fermentation

Fermented Mustard

Ingredients

  • 2/3 cup yellow mustard seeds

  • 1/3 cup yellow or brown mustard seeds (or split and do both) 

  • 1½ tablespoons fresh lemon juice

  • 2 tablespoons to ¼ cup water (or even more for a thinner consistency)

  • 1 teaspoon salt

  • 1 clove of garlic 

  • 1 tsp tummeric (optional) 

  • 2 tbs white vinegar or apple cider vinegar 

Instructions

  1. Take your seeds, add salt, and then cover with water and let ferment for 7 days till bubbly.

  2. Add turmeric (optional), garlic, and lemon juice to a food processor or blender and blend until pretty smooth.

  3. Add water slowly, until mustard reaches your desired consistency.

  4. Remove from the food processor and stir in vinegar. 

  5. Place in a jar, then place in the refrigerator.

Fermentation

Fermented Salsa

**Makes 1 quart

Ingredients

  • 1 medium onion, diced

  • 2 large tomatoes, diced

  • 1 medium green pepper, diced

  • 1–2 jalapeños, diced

  • Clove of garlic, minced

  • Handful of fresh cilantro

  • Lemon and lime juice to taste

  • 2 teaspoons salt


Instructions

  1. Mix all the ingredients.

  2. Place the salsa in a fermentation container, pressing down to release some liquid. Add a weight so that the vegetables are submerged under the liquid. Add a bit of extra water if needed.

  3. Ferment for 3+ days at room temperature.

  4. Remove the weight and move to the fridge and enjoy!

Fermentation

Fermented Ranch Dressing

Ingredients

  • 1 1/2 cups Kefir

  • 1/4 cup sour cream

  • 4 medium garlic cloves, minced

  • 1/2 teaspoon black pepper

  • 2 tablespoons parsley

  • 1 teaspoon salt

  • 1 1/2 tablespoons fresh lemon juice

  • 1 1/2 teaspoons dried onion powder

Instructions

  1. Place all the ingredients in a jar and mix well.

  2. Cover the jar and leave to ferment at room temperature for 1 day.

  3. Transfer to the refrigerator.

PREPARATION TIP

This dressing can easily be turned into a dip by separating the kefir from its whey, resulting in a thicker, creamier ranch dip. Do this by pouring the dressing into a wire mesh strainer lined with cheesecloth or a few coffee filters and set over a bowl. Once the whey has dripped out, transfer the dip to an airtight container and refrigerate until ready for use. If you wish to reserve the whey for other uses, complete this step before adding the spices so that the whey is not flavored.

Fermentation

Kimchi

Ingredients

  • Sea salt

  • 1 pound Chinese cabbage (napa or bok choy)

  • 1 daikon radish or a handful of red radishes

  • 2 whole carrots

  • 1 whole onions

  • 1 leek

  • Scallions

  • 10 cloves of garlic (minced) 

  • Dried red chili flakes

  • 3 tablespoons fresh grated gingerroot

  • 4 tablespoons brown rice flour (or alternative)

  • Water

  • This yields 1 quart of kimchi.

Instructions

  1. Mix a brine of 4 cups water and 4 tablespoons of salt. The brine should taste good and salty.

  2. Coarsely chop the cabbage, slice the radish and carrots (and/or any additional vegetables), and add the veggies to the brine. Let the vegetables soak in the brine, covered by a plate or other weight to keep the vegetables submerged until soft, for at least a few hours, but overnight is even better.

  3. Prepare the spices: In a pot heat ½ a cup of water with 4 tablespoons (more if needed) of brown rice flour. Heat on medium constantly stirring till you get a medium-thick paste. Cool the paste and then add the red chili flakes, grated ginger, minced garlic, and onion. Mix well. You can add fish sauce to the spice paste (just make sure it has no chemical preservatives that function to inhibit microorganisms), shrimp flakes, or other spices as well.

  4. Drain the brine of vegetables after soaking. Reserve the brine. Taste the vegetables for saltiness. If they are too salty, rinse them. If you cannot taste the salt, sprinkle a couple of teaspoons and mix.

  5. Mix the vegetables with the cooled spice paste. Mix everything well and then pack it into a clean quart-sized jar. Pack it, pressing down until the brine rises over the vegetables. If necessary, add a little of the reserved vegetable soaking brine to the submerged vegetables. Put a weight in the jar to keep the veggies submerged under the brine or, if you remember, you can just push them down with your fingers daily. Cover with a lid and put in a cool dark place to ferment. Ferment for at least one week and enjoy!

Fermentation

Beet Kvass

Beet Kvass

**Recipe makes half-gallon 

Ingredients

  • 2-4 red or golden beets (pending on size) 

  • 1 tbs sea salt 

  • Water 

  • Starter: such as sauerkraut brine, kimchi brine, etc (optional) 

Instructions

  1. Clean your beets well to remove dirt and debris. Remove the ends of the beets, but keep the skins on.

  2. Slice the beets into ½ inch pieces and place them in your jar or vessel.

  3. Using a second container mix the water and salt until it is dissolved.

  4. Pour over the beets until they are well covered with the brine.

  5. Optional: Add herbs, ginger root, or lemon for a more diverse flavor. Cover with a lid and leave to ferment for 2-4 days.

Fermentation

Idli Recipe

Idli Recipe

Ingredients

  • 1 cup lentils (Urad daal) 

  • 1 cup white basmati rice 

  • 1 tsp sea salt

  • water (as needed)

  • idli steamer ** you can find this at any Indian market or online for cheap

Instructions

  1. Put the lentils and rice in a bowl and cover with water. Leave to soak for 24-48 hours on a counter.  You can soak them separately or together.  Drain your grains and lentils and blend adding water as necessary. It should be a thick pancake consistency.

  2. Pour into a bowl, cover with a towel, and allow to ferment for 24-48 hours. Fermentation time will depend on the ambient temperature and other factors. Signs of fermentation will be that it will fluff up and rise, you might see a pool of liquid on top of the batter, the smell will be yeasty, etc. 

  3. With ghee or oil, grease the idli steamer, and fill each section with batter. Take a stock pot with 1-2 inches of water and bring it to a boil and then lower the filled idli steamer into the pot of water and cover with a lid. 

  4. Steam until a knife inserted into them comes out clean, around 15 minutes. They will fluff up and change color.

Fermentation

Vegan Miso Gravy

Vegan Miso Gravy

Ingredients

  • 3 tablespoons amaranth flour

  • 
2½ cups water


  • 1–2 tablespoons miso paste and/or 1 bullion cube 

  • 3 tablespoons coconut oil (or olive oil)

**NOTE: I recommend using a red, brown, or hatcho miso to get the desired flavor.

Instructions

  1. Dissolve miso and bullion in a little water in a saucepan.

  2. Add the remainder of the water and keep on low heat.

  3. In a separate frying pan heat oil over medium heat and stir in amaranth flour.

  4. Cook while stirring constantly with a flat spoon or whisk for about 5 minutes. Watch as the flour starts to golden brown.

  5. Add the broth and stir until the gravy reaches the desired consistency.

Kefir Two Ways

Kefir is hands down one of the best ferments for supporting the gut! While fermented dairy kefir is about 98% + lactose free some people still have a hard time digesting dairy. You’ll need to obtain Kefir Grains in order to make your kefir. We suggest ordering grains online from Cultures for Health or GEM Cultures .

With that in mind here is how we do Kefir both with dairy and without dairy! Make sure to read our notes at the end about keeping your grain cultures happy and healthy!

MILK KEFIR (DAIRY)

Ingredients

  • 1 tablespoon kefir grains

  • 8–16 ounces of milk (Goat or Cow: Organic, Non-Homogenized, and Raw are best.)

Instructions

  1. Add 1 tablespoon kefir grains to 8–16 ounces of raw milk in a jar with a lid. 

  2. Let it sit on the counter at room temperature for 24–72 hours depending on how sour you like it. You can taste it to check.

  3. Shake a couple times a day to keep fresh nutrients available to the grains.

  4. Strain the milk so you can keep the kefir grains to make a new batch.

  5. Put the strained kefir in a jar with a tight lid and keep it out of the fridge for a few hours. This will increase fizziness.

NOTE: The grains multiply. You can share them with friends or keep growing more. They work better if you keep them outside of the fridge. If you need to take time off from kefir, you can place them in some fresh milk and then put them in the fridge indefinitely. Once you are ready to use them again, rinse them off and begin the process from the beginning.

COCONUT KEFIR (NON-DAIRY)

Ingredients

  • 1 Tablespoon kefir grains

  • 8–16 ounces of full fat canned coconut milk or you can get young Thai coconuts and use the water and scrape the pulp and blend to make your own coconut milk

Instructions

  1. Use the same recipe for original milk kefir; just replace the dairy with coconut milk. 

NOTE: Make sure to put the grains in dairy milk every 2–3 batches to keep them happy and healthy.


Macadamia Nut Tasty Paste

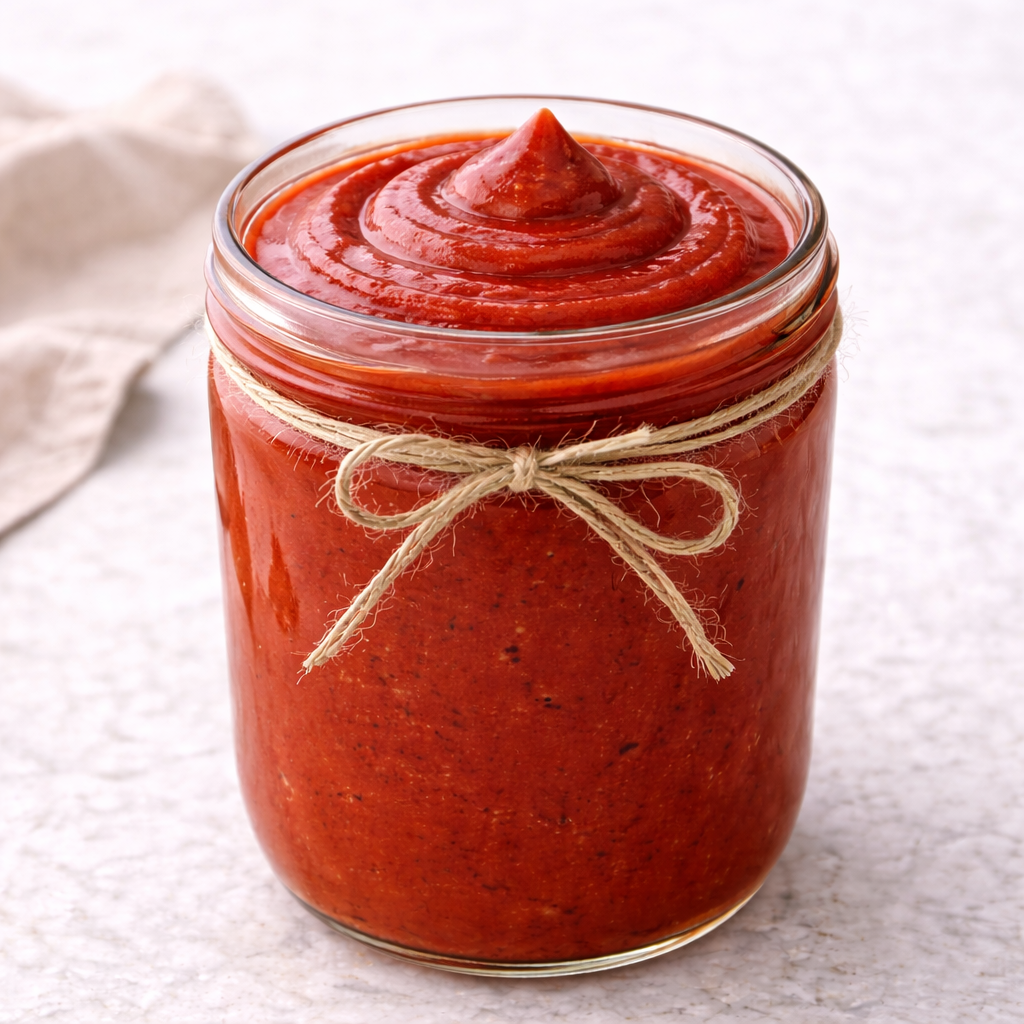
One of our favorite ferments is this quick Tasty Paste or you could also call it a Nut or Seed Miso. Swap out for whatever nuts you like! We love to add it to Fermented Vegan Cheeses, spread it on Toast, make a light noodle broth, use it in a Fermented Cashew Cheesecake and more. This is also one of the recipes we contributed to the book Miso Tempeh Natto by Kirsten & Christopher Shockey. We are honored to be one of their Meet the Makers and to have gotten to share some of our favorites with you!

Macadamia Tasty Paste

Makes: 1 pint 

Ingredients: 

  • 1 cup macadamia nuts 
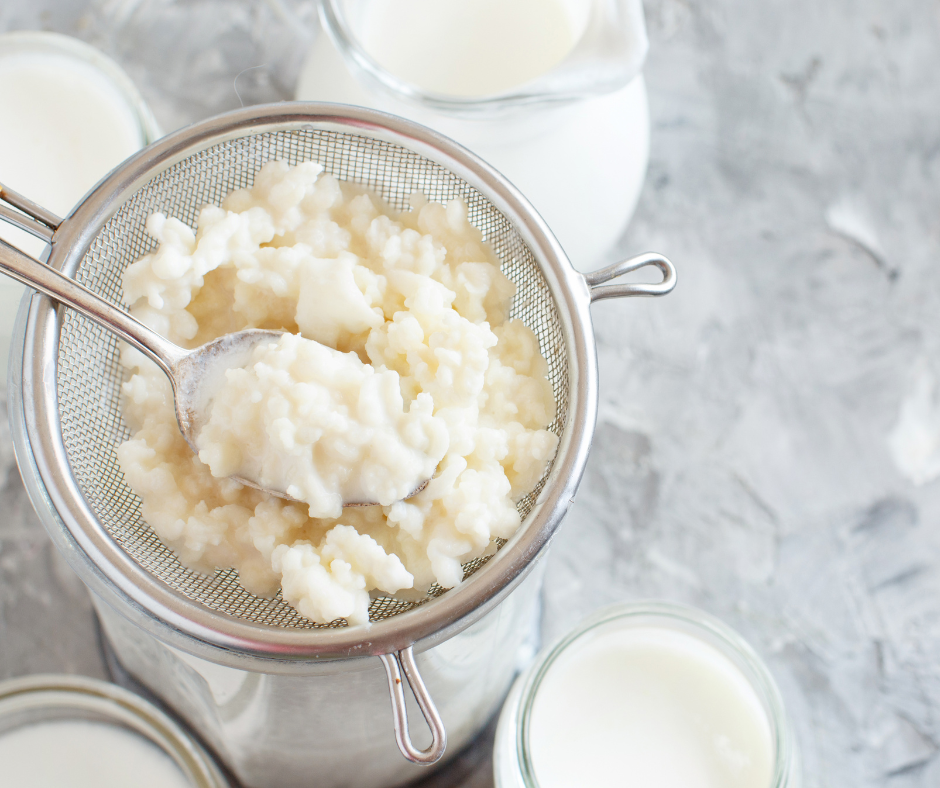
  • 1/2 cup koji 

  • Sea salt 

Instructions: 

To start soak your macadamia nuts overnight. (Or 6-8 hours) 

Put your koji in a bowl and hydrate with 1/4 cup of water. Mix well so everything is hydrated. 

Strain your soaked macadamia nuts. 

Put your nuts and koji in a blender or food processor with a little fresh filtered water to help it blend to a toothpaste consistency. 

Add 1.2 teaspoons sea salt and mix well. 

Move the blended mixture to a small jar making sure to tap or press out any big air bubbles or pockets. Be sure to leave 1/2 to 1 inch head room as we’ve found the nut misos to be especially active in a short amount of time. 

Put a lid on the jar and label it with its contents and the date. This is a quick ferment 3-5 days and you’re set. You can also go longer to have a more mature nut miso. In that can we suggest you coat the jar with a very thin coat of sea salt like you would with a longer Bean Miso ferment. 


Screen Shot 2018-11-14 at 10.38.43 PM.png

Fermented Eggnog - Holiday Magic in a Bottle

The holidays are here and while I’m a little late in posting and starting this winter favorite, later is better than never! I have to admit I love the nostalgia and taste of a good eggnog, and what I don’t like is the aftermath of stomach upset that can sometimes come with it. This recipe is adapted from the Fermenters Club (www.fermentersclub.com) So, here is our favorite go to eggnog recipe both with dairy and without dairy (yes you can make it TWO ways!) and you can also have the option to add booze or no booze. It’s a holiday drink for everyone!

Fermented Eggnog (Dairy version)

Ingredients

  • 12 large chicken eggs

  • 2¼ cups sugar

  • ¾ cups local honey

  • 1 pint half-n-half

  • 1 pint  milk kefir (For a dairy free version use coconut or almond kefir)

  • 1 pint heavy cream

  • 1 teaspoon nutmeg

  • 1/2 teaspoon cinnamon

  • 1/2 teaspoon ginger

  • ¼ teaspoon fine sea salt

Instructions

  1. Separate the yolks from the egg whites, and store/use the whites for another purpose.

  2. Beat the yolks with the honey, sugar and nutmeg in a large mixing bowl until the mixture lightens in color and falls off the whisk in a solid ribbon.

  3. Combine kefir, cream and half-n-half and salt in a second bowl or pitcher and then slowly beat into the egg mixture.

  4. Dispense mixture into glass bottles (three 750ml bottles e.g.) with screw caps or grolsch style swing top lids.

  5. Place bottles in the refrigerator to cure for 1 to 4 weeks If you remember, turn the bottles every week. It will slowly thicken and build up pleasant carbonation as it cures.

  6. Be careful when opening-- best to open slowly over the kitchen sink. Some pressure may have built up in the bottles.

  7. Let it sit for up to hour until it warms back to room temperature and thickens. The texture will be better than the richest cappuccino you've ever had (i.e. YES this final step is worth waiting for!)

Boston Fermentation Festival 2018

See us here teaching at the 2018 Boston Fermentation Festival on Miso.

Miso Making with Cheryl Paswater In this short class we will cover the basic science behind making miso, why it is good for you and how to make it yourself. Miso is a traditional Japanese product produced by fermenting soybeans with salt and the fungus Aspergillus oryzae called Koji.

Embed Block
Add an embed URL or code. Learn more

Miso. Tempeh. Natto. And other Tasty Ferments! Out on Pre-order

We’re pretty excited about this gem coming out in 2019! This is the third book by our good friends Kirsten & Christopher Shockey and we’re super excited that you find some of our Miso recipes in this gem! Get those orders in!

Screen Shot 2018-10-18 at 11.51.03 AM.png

Berkshire Fermentation Festival Presenter Videos

What a lovely weekend at the Berkshire Fermentation Festival! This was our third year back teaching and we’re happy to announce that the videos from all the presenters are now up online for you to enjoy!

Catch our Miso Workshop along with presenters Sandor Katz, Adam Elabd, Amanda Feifer, Anne Yonetani, and Alana Chernila!!

CHECK IT OUT HERE!

From the 4th Annual Berkshire Fermentation Festival, Cheryl Paswater talks about making miso.

Hoshigaki

Hoshigaki are a Japanese delicacy made by gently massaging persimmons while they air dry.
The persimmons used to make Hoshigaki are astringent varieties such as Hachiya. Ideally, choose fruit that still has part of the stem. We've used a couple different varieties of persimmons with nice success.

1) The first step is to cut the top off, while carefully leaving the stem that you will tie string to and they will hang from. And then use a knife of peeler to trim away the skins of the persimmon. Then attach the string and find a good place for your Hosigaki to hang. Broom handles work great for this, we've also used knitting needles, drumsticks and hangers to hang the Hoshigaki from.


2) The first week you just let the Hoshigaki hang and dry till they start to create a thin skin.  After a week has passed you begin to gently massage each persimmon every other day. Be careful not to break the skin.

3) As you keep massaging every other day the fructose in the fruit will begin to come to the surface. The "bloom" begins to appear...it looks like powdered sugar on your persimmons. Keep massaging until the persimmons are more like a dried fruit, changing into a darker color with the bloom, and then enjoy!

Hoshigaki

Hoshigaki