Contraband Ferments

Fermentation

Gluten-Free Sourdough Pizza

Ingredients

Instructions

  1. Combine the first 4 ingredients in a medium bowl and whisk quickly until a thick gel forms.

  2. Add salt and again mix until thoroughly combined.

  3. Add starter, and mix thoroughly.

  4. Next add the flour and stir until flour is well incorporated. Then add oil, stirring until combined.

  5. Cover and let ferment for approximately 4 hours at room temp (if your home is cold it may take up to 6 hours).

  6. After it is done fermenting it will be slightly puffed up but not double in size. Preheat oven to 500*f with a pizza stone, cast iron skillet, or baking pan in it.

  7. Gather two pieces of parchment paper big enough for your pizzas and divide the dough in two.

  8. Put one piece of dough on each of the parchment papers and with wet hands shape the dough into the pizza shape you desire, leaving a ridge for a crust.

  9. Once the pizza is shaped, use a fork to gently poke holes all over the flat (center) part of the crust.

  10. When the oven is preheated, carefully lift the parchment with crust on it, onto the pizza stone (I use a dinner plate to help with the transfer).

  11. Next, close the oven door most of the way and carefully use a spray bottle to spray water on the side of the oven wall to facilitate steam (this is what makes the crust rise) then quickly close the door the rest of the way.

  12. Turn the oven to High Broil for approximately 1 minute. Then turn it back to 500° F to finish baking.

  13. Bake for about 5-7 minutes or until finished rising but not all the way browned yet. Take out of the oven and top as desired.

  14. Put back in the oven to finish baking at 500° F for another 7-10 minutes or until the crust is browning and the cheese or toppings are bubbly.

  15. Repeat with other pizza!

Kefir Two Ways

Kefir is hands down one of the best ferments for supporting the gut! While fermented dairy kefir is about 98% + lactose free some people still have a hard time digesting dairy. You’ll need to obtain Kefir Grains in order to make your kefir. We suggest ordering grains online from Cultures for Health or GEM Cultures .

With that in mind here is how we do Kefir both with dairy and without dairy! Make sure to read our notes at the end about keeping your grain cultures happy and healthy!

MILK KEFIR (DAIRY)

Ingredients

  • 1 tablespoon kefir grains

  • 8–16 ounces of milk (Goat or Cow: Organic, Non-Homogenized, and Raw are best.)

Instructions

  1. Add 1 tablespoon kefir grains to 8–16 ounces of raw milk in a jar with a lid. 

  2. Let it sit on the counter at room temperature for 24–72 hours depending on how sour you like it. You can taste it to check.

  3. Shake a couple times a day to keep fresh nutrients available to the grains.

  4. Strain the milk so you can keep the kefir grains to make a new batch.

  5. Put the strained kefir in a jar with a tight lid and keep it out of the fridge for a few hours. This will increase fizziness.

NOTE: The grains multiply. You can share them with friends or keep growing more. They work better if you keep them outside of the fridge. If you need to take time off from kefir, you can place them in some fresh milk and then put them in the fridge indefinitely. Once you are ready to use them again, rinse them off and begin the process from the beginning.

COCONUT KEFIR (NON-DAIRY)

Ingredients

  • 1 Tablespoon kefir grains

  • 8–16 ounces of full fat canned coconut milk or you can get young Thai coconuts and use the water and scrape the pulp and blend to make your own coconut milk

Instructions

  1. Use the same recipe for original milk kefir; just replace the dairy with coconut milk. 

NOTE: Make sure to put the grains in dairy milk every 2–3 batches to keep them happy and healthy.


Macadamia Nut Tasty Paste

One of our favorite ferments is this quick Tasty Paste or you could also call it a Nut or Seed Miso. Swap out for whatever nuts you like! We love to add it to Fermented Vegan Cheeses, spread it on Toast, make a light noodle broth, use it in a Fermented Cashew Cheesecake and more. This is also one of the recipes we contributed to the book Miso Tempeh Natto by Kirsten & Christopher Shockey. We are honored to be one of their Meet the Makers and to have gotten to share some of our favorites with you!

Macadamia Tasty Paste

Makes: 1 pint 

Ingredients: 

  • 1 cup macadamia nuts 

  • 1/2 cup koji 

  • Sea salt 

Instructions: 

To start soak your macadamia nuts overnight. (Or 6-8 hours) 

Put your koji in a bowl and hydrate with 1/4 cup of water. Mix well so everything is hydrated. 

Strain your soaked macadamia nuts. 

Put your nuts and koji in a blender or food processor with a little fresh filtered water to help it blend to a toothpaste consistency. 

Add 1.2 teaspoons sea salt and mix well. 

Move the blended mixture to a small jar making sure to tap or press out any big air bubbles or pockets. Be sure to leave 1/2 to 1 inch head room as we’ve found the nut misos to be especially active in a short amount of time. 

Put a lid on the jar and label it with its contents and the date. This is a quick ferment 3-5 days and you’re set. You can also go longer to have a more mature nut miso. In that can we suggest you coat the jar with a very thin coat of sea salt like you would with a longer Bean Miso ferment. 


Screen Shot 2018-11-14 at 10.38.43 PM.png

Shio Koji

Shio Koji in short means “ Salt Koji.” You take koji, salt, and water and let it sit for around 10 days. What I find most interesting about the Shio Koji process is that salt actually kills the Aspergillus oryzae. Lucky for us, it’s enzymes remain and when you throw into the mix the carbohydrates and sugars that exist in grains and by creating the right fermentation environment you are able to grow some solid bacteria. What does this mean for us? We have this amazingly tasty, umami, bacterial goodness that we can use to create other fermentations or secondary fermentations.

Here’s a list of some of our favorite uses for Shio Koji:

  • Shio Koji cured meat

  • Shio koji in handmade pasta (a lovely trick we learned from Ourcookquest)

  • Sauces & Marinades

  • An alternative for soy sauce

  • Alternative ways to make pickles

Here’s our recipe for Shio Koji :

2 cups koji

2 cups water

1/8 cup salt

Mix together well and move to a jar with a finger tight lid. Let it sit in a cool and dark place for 10-12 days. Every day you’ll want to stir or shake the mixture. When it’s complete you can opt to blend the mixture or leave it in it’s original state and then move it to the fridge. Shio Koji can be used for 6 month from the date of making — so make sure you date it.

IMG_8665.jpg

Fermented Eggnog - Holiday Magic in a Bottle

The holidays are here and while I’m a little late in posting and starting this winter favorite, later is better than never! I have to admit I love the nostalgia and taste of a good eggnog, and what I don’t like is the aftermath of stomach upset that can sometimes come with it. This recipe is adapted from the Fermenters Club (www.fermentersclub.com) So, here is our favorite go to eggnog recipe both with dairy and without dairy (yes you can make it TWO ways!) and you can also have the option to add booze or no booze. It’s a holiday drink for everyone!

Fermented Eggnog (Dairy version)

Ingredients

  • 12 large chicken eggs

  • 2¼ cups sugar

  • ¾ cups local honey

  • 1 pint half-n-half

  • 1 pint  milk kefir (For a dairy free version use coconut or almond kefir)

  • 1 pint heavy cream

  • 1 teaspoon nutmeg

  • 1/2 teaspoon cinnamon

  • 1/2 teaspoon ginger

  • ¼ teaspoon fine sea salt

Instructions

  1. Separate the yolks from the egg whites, and store/use the whites for another purpose.

  2. Beat the yolks with the honey, sugar and nutmeg in a large mixing bowl until the mixture lightens in color and falls off the whisk in a solid ribbon.

  3. Combine kefir, cream and half-n-half and salt in a second bowl or pitcher and then slowly beat into the egg mixture.

  4. Dispense mixture into glass bottles (three 750ml bottles e.g.) with screw caps or grolsch style swing top lids.

  5. Place bottles in the refrigerator to cure for 1 to 4 weeks If you remember, turn the bottles every week. It will slowly thicken and build up pleasant carbonation as it cures.

  6. Be careful when opening-- best to open slowly over the kitchen sink. Some pressure may have built up in the bottles.

  7. Let it sit for up to hour until it warms back to room temperature and thickens. The texture will be better than the richest cappuccino you've ever had (i.e. YES this final step is worth waiting for!)

Boston Fermentation Festival 2018

See us here teaching at the 2018 Boston Fermentation Festival on Miso.

Miso Making with Cheryl Paswater In this short class we will cover the basic science behind making miso, why it is good for you and how to make it yourself. Miso is a traditional Japanese product produced by fermenting soybeans with salt and the fungus Aspergillus oryzae called Koji.

Embed Block
Add an embed URL or code. Learn more

Miso. Tempeh. Natto. And other Tasty Ferments! Out on Pre-order

We’re pretty excited about this gem coming out in 2019! This is the third book by our good friends Kirsten & Christopher Shockey and we’re super excited that you find some of our Miso recipes in this gem! Get those orders in!

Screen Shot 2018-10-18 at 11.51.03 AM.png

Berkshire Fermentation Festival Presenter Videos

What a lovely weekend at the Berkshire Fermentation Festival! This was our third year back teaching and we’re happy to announce that the videos from all the presenters are now up online for you to enjoy!

Catch our Miso Workshop along with presenters Sandor Katz, Adam Elabd, Amanda Feifer, Anne Yonetani, and Alana Chernila!!

CHECK IT OUT HERE!

From the 4th Annual Berkshire Fermentation Festival, Cheryl Paswater talks about making miso.

Hoshigaki

Hoshigaki are a Japanese delicacy made by gently massaging persimmons while they air dry.
The persimmons used to make Hoshigaki are astringent varieties such as Hachiya. Ideally, choose fruit that still has part of the stem. We've used a couple different varieties of persimmons with nice success.

1) The first step is to cut the top off, while carefully leaving the stem that you will tie string to and they will hang from. And then use a knife of peeler to trim away the skins of the persimmon. Then attach the string and find a good place for your Hosigaki to hang. Broom handles work great for this, we've also used knitting needles, drumsticks and hangers to hang the Hoshigaki from.


2) The first week you just let the Hoshigaki hang and dry till they start to create a thin skin.  After a week has passed you begin to gently massage each persimmon every other day. Be careful not to break the skin.

3) As you keep massaging every other day the fructose in the fruit will begin to come to the surface. The "bloom" begins to appear...it looks like powdered sugar on your persimmons. Keep massaging until the persimmons are more like a dried fruit, changing into a darker color with the bloom, and then enjoy!

Hoshigaki

Hoshigaki

Fermented Cranberry Relish

I think a lot of people have a love hate relationship with cranberries. As the holidays have rolled around and Thanksgiving came I was thinking a lot about cranberry sauce and how I like it and yet I don't like it but, something in me wanted to redeem what magic cranberries do have so I took it to the kitchen and with the power of fermentation by my side decided to whip up a fermented cranberry relish and the result was a good one! I packed multiple jars for friends and family on a recent Thanksgiving trip to Virginia and Washington DC and it was a hit! Lovers of cranberries and non lovers alike enjoyed this tangy fermented gift. With the hollidays in full swing we hope you'll take a stab at this yummy ferment for the holidays.


Fermented Cranberry Relish

Ingredients:

  • Fresh cranberries (3 cups)
  • Dried cranberries (1 cup)
  • Ginger root (2 inch piece)
  • Sugar (3 tablespoons)
  • Sea salt (1 tablespoon)
  • Cinnamon (optional)
  • Walnuts (optional)

Take your cranberries and put them in a food processer and rough chop them. Move to a bowl and add a sea salt. Stir well to allow the brine to start coming out of the cranberries. Grate the ginger root. Add the ginger, sugar, and dried cranberries to the bowl. Mix well. Add cinnamon or chopped walnuts as an optional added bit of magic. Move the mixture to a jar and pack it down, add a weight to keep it submerged below the brine. Cover with a lid or towel and put in a cool dark place to ferment. We let our sit for about 5 days before harvesting.


IMG_2510.jpg

Cinnamon Fig Shrub

Shrubs! We first fell in love with shrubs on a trip to Portland, Oregon when we hit up the coffeeshop Barista and they had an amazing Fig Shrub based Espresso drink with some other magic mixed in. It was absolutely amazing and when when we got home we started making these easy and tasty drink mixers. We like them in bourbon, gin, seltzer, and more!

This is our Cinnamon Fig Shrub that we recently made after being asked by our friends Thomasin and Alex to make a drink mixer for their upcoming wedding. They wanted something that people could take away as a gift and that would be a nice mixer....so Cinnamon Fig Shrub it was! We love this delightful fall mixer and we think you will too! Note: if you save all those ends and tips you can use them to make a nice Fruit Scrap Vinegar which is what we did!

Cinnamon Fig Shrub

Ingredients:
Fresh Figs
Sugar
Raw Apple Cider Vinegar
Water
Cinnamon Stick (optional)

Directions:

    - Add equal parts of sugar and water to a saucepan, and heat and stir until the sugar dissolves.
    - Add figs and simmer until the fruit's juice blends well into the syrup.
    - Let it rest till it cools
    - Add vinegar to the syrup in a large (ideally glass) container
    - Cover with a lid or airlock and let ferment for 5-10 days
    - Filter your shrub through a strainer and enjoy!


Pistachio Miso

One of my favorite things about winter is teaching Miso Workshops. We only teach Miso making in the winter since Miso is traditionally started in the winter months, so when it was time to start amping up for our winter workshops at the Brooklyn Botanic Gardens and Enlightenment Wines we went and started digging through our Miso stash to see what we wanted to share with our students. If you got a chance to make it to the NYC Fermentation Festival then you likely got to test out some of our Miso's there as well. From our Chickpea Leek Kelp Miso, Blackbean Miso, to our Cashew Miso we've been all about Miso this winter so we wanted to share one of our favorite recipes of late with you. We've be playing with nuts and seeds a lot lately and Pistachio Miso has become one of our favorites. A quick and easy ferment, guaranteed to be a nice accoutrement to any meal.

Here's our recipe:

1 cup Raw unsalted pistachios

1/2 cup Koji (rice or barley koji)

Sea salt

Instructions:

Soak the pistachios for 2-4 hours. Drain the excess liquid. Soak the koji in a few tablespoons of water while you prep the nuts and blender.

In a blender combine the soaked pistachios with the koji and 1 tbs of sea salt and blend into a paste. You will likely have to add a little filtered water while you blend. You ultimately want it to be a toothpaste consistency.

Take a wide mouth jar and pour the mixture into the jar, leaving room at the top, put on a lid and let sit for 2-4 days in a cool dark place.

We like to use this miso as a spread on baked fish, toast, as a soup, in salad dressings and more. We hope you enjoy it as much as we do!

Fermentation and the Human Microbiome Resource List

The First Annual NYC Fermentation Festival was a couple weekends ago here in Brooklyn, NY. It was a fantastic turnout and filled with amazing vendors, workshops, and more! Erin Cramm and I taught on Fermentation and the Human Microbiome this year at the festival and we wanted to share out list of favorite reads and more on this topic with you. So here are our picks and we hope you get a chance to enjoy them as much as we have!

Erin’s List:

I Contain Multitudes - Ed Yong

Food Rules - Michael Pollan

Gut - Giulia Enders

The Human Super-Organism - Dr. Rodney Dietert

Brainmaker - Dr. David Perlmutter

This is Your Brain on Parasites - Kathleen McAuliffe

The Gene - Siddhartha Mukherjee


Cheryl’s List:

The Art of Fermentation - Sandor Katz

Wild Fermentation - Sandor Katz

The Good Gut - Justin Sonnenburg

The Symbiont Factor - Dr. Richard Matthews

Cooked (Book & Netflix Series) - Michael Pollan

An Epidemic of Absence - Moses Velasques-Manoff

Missing Microbes - Dr. Martin J. Blaser


Check out the latest from us! The Art of Secondary Fermentation for Edible Brooklyn!


Wondering how to flavor your kombucha? Want to know how it's ready? Check out our recent article written by our Chief Fermentationist, Cheryl Paswater for Edible Brooklyn! Also, you can find us in February's Drink's Issue of Edible Brooklyn with a look inside our home fermentation station and more!


https://www.ediblebrooklyn.com/2017/secondary-kombucha-fermentation/


Fermentation

Herbal Medicine Meets Fermentation by Meghan Hintz

We're super excited to have guest blogger Meghan Hintz writing this fantastic blog on herbal medicine, fermentation, and sharing her recipe for Nettles Kraut! Meghan is a Fermentationist, Functional Nutrition Health Coach, and creator of Herba Flora, ( http://herbaflorahealth.com/) a line of herbal digestives free from alcohol, sugar, and other common allergens. She lives in the Pacific Northwest where she is currently fawning over the glorious awakening of spring.


HERBAL MEDICINE MEETS FERMENTATION

While fermented foods are celebrated – and rightly so – for their digestive and

immune support, they are also notable for the increased bio-availability of their

nutrients. As friendly microorganisms break down cellulose, vitamins and minerals

are liberated making them especially easy for our bodies to absorb. Beyond the

nutrient value, fermentation releases a more mysterious and nuanced quality of

plants – their medicinal actions.

Just as the fermentation process frees nutrients, it is able to extract the therapeutic

properties of herbs. This can be a fabulous alternative to alcohol-based tinctures, as

alcohol can increase intestinal permeability and may not be suitable for children,

pregnant women, and those experiencing alcohol sensitivity or addiction.

When choosing herbs for your ferment consider flavor and herbal actions. Food

herbs like fennel, ginger, and turmeric are naturals and help ease gas, settle an upset

stomach and decrease inflammation, respectively. Rose is calming to the nerves and

pleasantly floral, but also astringent so start with small amounts. Remember that

your ferment will take time so herbs that become harsh after a long steep (think

lavender) may not be the best fit. Likewise, steer clear of herbs with strong

antimicrobial actions that could kill off friendly bacteria and halt fermentation.

Favorite spring tonic herbs, all suitable for sauerkraut and miso, include burdock

root for the liver and skin, dandelion root and leaf (the leaves can be quite bitter, the

root more mild) for the liver and kidneys, and my favorite: nettles.

Stinging Nettles, Urtica dioica, are exceptionally high in minerals, anti-inflammatory,

and supportive of the adrenal glands. With their bright color, grassy flavor, and

nutritional boost they are the epitome of spring. They grow wild in parts of North

America and can be found at farmers markets this time of year, but you can also use

dried nettles. They lose their sting when cooked, dried, or fermented, but be sure to

wear gloves while handling them fresh!

Spring is a time of rebirth and renewal. It’s the perfect time to look beyond the well-loved

traditional benefits of fermentation and experiment with the new flavors and beneficial actions

spring herbs have to offer.


Nettle Sauerkraut (1 quart)

1.25 lbs Green cabbage, evenly sliced (reserve the core and one outer leaf)

½ cup packed fresh nettle leaves, chopped (don’t forget the gloves!)

OR

2 Tbsp dried nettles moistened with 1 Tbsp heated water

2-3 scallions, sliced into rings

2 ½ tsp coarse grey Celtic sea salt

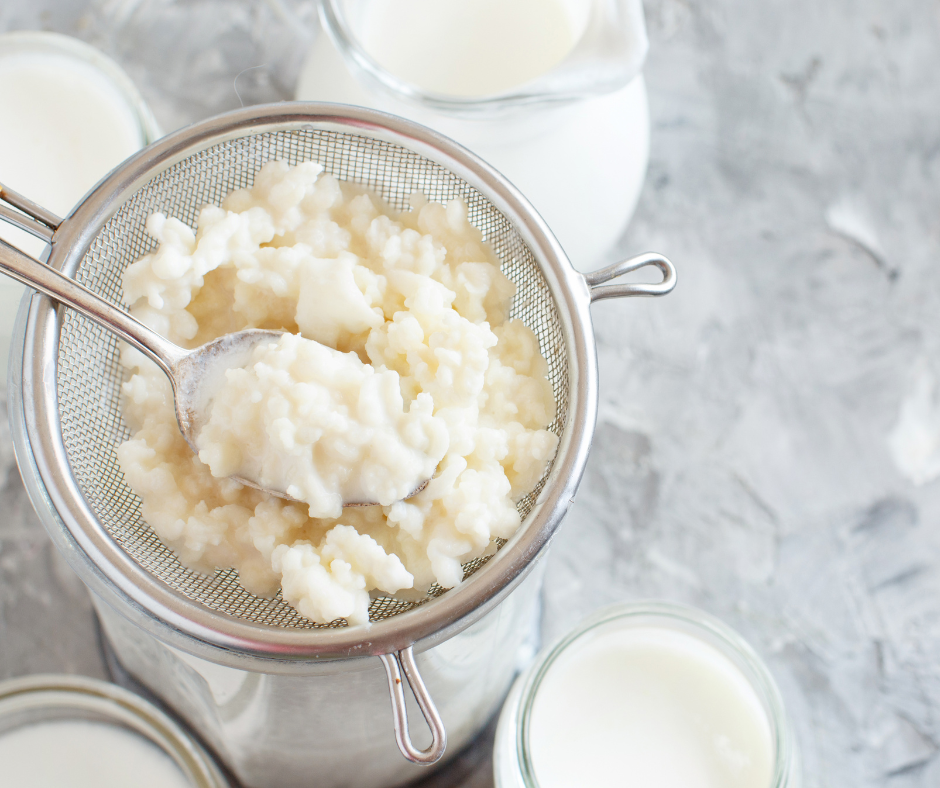
Use your favorite fermentation technique to make your Nettle Sauerkraut. I use

Sandor Katz’s technique.

Now that you’re wildly curious about nettles, here’s a lovely write-up for more info:

http://www.susunweed.com/Article_Energy_Stamina.htm

This information is not intended to diagnose, treat, or cure any disease. Please consult

a medical professional before beginning any healthcare regimen.

The Illustrated Journal with Caroline Choe

We had the honor to be on The Illustrated Journal with Caroline Choe (S3E1: "Around the Table"). She videoed somer of the collaborative dinners put on by Contraband Ferments and goldpennyloafer (www.goldpennyloafer.com). We love this video that greatly captures community and how food brings people together!

https://www.youtube.com/watch?v=zPt5ojMEAxA

Just Food Conference 2016

Just Food Conference 2016    by Cheryl Paswater, Chief Fermentationist, Contraband Ferments

One of my favorite events of the year was this past weekend, the Just Food Conference at Teachers College, Columbia University. It's a yearly conference dedicated to ethical food practices, food advocacy, greenmarkets, CSA's, farming, education, and more! It's always been a wonderful learning experience, filled with so many amazing people, and a strong current around building communities. After all, food brings communities together!

I've always attended the conference as a attendee that squeezes in as many workshops and lectures as possible and talking to as many people I can but, this year I had the honor and privilege to to get to be a presenter with my good friend Erin Cramm (also notoriously known as my fermentation wife) on the Human Microbiome and Fermentation. So after spending the morning catching up with friends and fellow food nerds, and squeezing in multiple workshops that morning from Herbal Medicine, to GMO Laws in NY, to Using Food as a Tool to End Mass Incarceration, and even catching part of Andrea Beamans lecture on Detoxing your Liver, and a lovely locally grown lunch we powered up or an afternoon of nerdy bacteria talk.

I won't go into all the details because I would be here all day but, I do want to share our favorites list for all things Fermentation and the Human Microbiome! We hope you enjoy it!

Resources for the Gut Microbiome and Ferments

Gut

Giulia Enders (Book)

The Good Gut

Justin and Erica Sonnenburg (Book)

Cooked, Book & Netflix Series

Michael Pollan (Episode/Chapter: Earth)

How Bacteria “Talk”

Bonnie Bassler (TED talk)

Missing Microbes

Martin J. Blaser, MD

Fuhmentaboudit! (Radio Show)

http://heritageradionetwork.org/series/fuhmentaboudit/

Wild Fermentation & The Art of Fermentation

Sandor Katz (Book)

Body Ecology Diet

Donna Gates

Gut and Psychology Syndrome

Dr. Natasha Campbell- McBride, MD

The Symbiont Factor

Richard Matthews, DC, DACNB, FACFN

The Epidemic of Absence

Moises Velasquez-Manoff

The Human Microbiome Project

http://hmpdacc.org/

Pickle Juice, Probiotics, & The Bad Bugs: with Guest blogger Robbie Bianchi-Pray

We are super excited to have another guest blogger this week here at Contraband Ferments! Robbi Bianchi-Pray is a Nutritional Therapist, Fermentationist, and GAPS practitioner based out of Chicago, IL. She's passionate about food and healing through food, has some killer tattoos, and is an all around bad ass! Enjoy this amazing post!


Pickle Juice, Probiotics, & The Bad Bugs

 by Robbie Bianchi-Pray

I remember drinking the pickle juice as a girl. My desire for that salty and tangy brine was always stronger than my craving of sweets like other kids. After becoming a Certified Nutritional Therapist, Fermentationist, and a Gut and Psychology Practitioner; I discovered why…

My desire for this deliciously salty and tangy brine, was actually one of the first signs of my stomach acid deficiency.

Stomach acid serves as a first line of defense against invaders in the body. Destroying pathogenic bacteria onsite and keeping the bodies precious ecosystem in balance while saving you from experiencing digestive and stomach distress. You know what I am talking about… the screaming shits? Ever came down with Medusa’s revenge?

In addition to the need for hydrochloric acid, I think my poor little body new it was in dire need of fermented foods. Fermented foods help to repopulate the gut. Humans used to receive soil based organisms daily from their food. Since big agriculture has now began sterilizing the soil with pesticides, herbicides, and fungicides; the number of these monumental little allies have dropped exponentially.

Not only does the body require an acidic environment in the stomach to break down fats, proteins, along with vitamins and minerals; the body also requires a strong community of bacteria to ensure proper breakdown and absorption of all those tasty organic ingredients that you call dinner.

We now know that 90% of the cells and genetic materials in our body consist of gut flora. That means that we are simply a 10% shell to house this incredible inner ecosystem. They outnumber us 10 to 1! In order to have a healthy and balanced inner ecosystem or Microbiome as they have termed it today; we are required to consume a plentiful amount of these beneficial bacteria daily.

Grocery store shelves are lined with so-called healthy probiotics supplements to choose from. Unfortunately, many of these products do not contain what the labels claim. When tested, many of them did not even contain the bacteria species they claimed on the label, nor did they have the claimed bacterial strength!

A good probiotic should have as many different species of bacteria as possible, and there should be a mixture of them in order to derive maximum benefit. A mixture of strains is most beneficial and it is best to have a combination of lactobacilli, bifidobacteria, and soil based organisms. It should have a concentrated amount of at least 8 billion bacteria cell per gram. You need to provide the body with enough organisms per dose to actually feel an improvement or healing reaction. I recommend working with a qualified practitioner when ordering supplements period. This ensures a professional and therapeutic grade product. Ordering online or purchasing from big box discount stores is risky because you never know how old the product, how it was stored, or if the product even contains what is claimed. For example, probiotics and fish oil are very heat and age sensitive… Do you want your supplements to be rancid or expired upon purchase? In addition, many supplements available are rip offs or rejects containing no health benefits at all, along with potential serious risks. Check out this link to hear more about the risk of gluten, heavy metals, and other reasons to always purchase supplements from a qualified healthcare professional. To order your therapeutic grade probiotics now, visit my store.

As you introduce probiotic bacteria into your new health regimen at a therapeutic dose, you will likely produce the so-called “die off” reaction. These bacteria will begin to kill off and destroy pathogenic bacteria, viruses, and fungi. When these bad boys begin dying off, they will produce a large amount of toxicity! These toxins are often the cause of your previous symptoms. The characteristics of symptoms you experienced prior to, are likely to present themselves and may temporarily get worse. You may find yourself more tired than usual or generally of color. In addition, you may experience any number of possible new symptoms like an unexpected rash, feeling emotional, or even flu like symptoms. This is a temporary reaction and typically only lasts a few days to several weeks depending on the individual.

To make the experience as bearable as possible it is important to build upon your doses to reduce the onset of an extreme healing reaction. Build the probiotics slowly starting with a very small dose. Observing for “die-off” reactions and settle on each dose prior to increasing the dose again. If you have a strong reaction, you may choose to grin and bare through it or back of to the previous dosage for a week before trying again. You may find that it takes a several weeks to a number of months to reach a therapeutic dosage. Some people even take years…

According to world renowned neurologist, neurosurgeon, nutritionists, and author of Gut and Psychology Syndrome, Dr. Natasha Campbell-McBride, a therapeutic probiotic dosage for an adult is 15-20 billion bacteria cells per day. Her research, Gut & Psychology Syndrome or “GAPS” protocol connects the brain with the gut and is what I would consider a 3 legged stool approach. It combines diet, supplementation and lifestyle changes to maximize healing and sealing of the gut, eliminating food allergies, starving out pathogenic “bad bacteria” and repopulating with beneficial flora along with addressing other physical symptoms like autoimmune disorders, psychological symptoms like depression, anxiety, autism, and ADD/ADHD along with various digestive disorders such as IBS, Crohn’s disease, constipation, and diarrhea as well.  To learn more, please refer to her book for a complete guide to probiotics and the supporting diet protocol and book your free 15 minute consultation today.

Once a therapeutic dosage has been reached, it should be maintained for a minimum of 6 months to rebuild normal gut flora and remove the pathogenic bacteria. Adhering to the GAPS nutritional protocol is paramount to your success. One must starve out the “bad bugs” to allow our beneficial friends to predominate. After the therapeutic period is completed the therapeutic dose may be slowly decreased at the same rate it was applied. Observe for reactions. The maintenance dose is individual and may take quite some time to discover.

My favorite way to receive these beneficial buddies is with the addition of delicious, unpasteurized, probiotic rich fermented foods into the diet!  Sauerkraut and lacto-fermented vegetables along with homemade milk kefir, yogurt and creme frais are a delicious way to daily receive the beneficial probiotics and yeast into your the belly that keep pathogenic and opportunistic microbes at bay.

These beneficial microbes or “probiotics” will aid in digestion and even employ other opportunistic bacteria. Believe it or not they will even multiply the vitamins C in your cabbage by 200%! Creating loads of lactic acid and B vitamins, breaking down fibers and protein, they transform a simple cabbage into an absolute superfood! These fabulous friends then stimulate your immune response and will absorb toxins.

Probiotic supplementation is paramount to vibrant health and vital to treating any form of digestion, psychological, and physiological disorders. Enjoying that tasty sauerkraut will pay off in folds stimulating your hydrochloric acid production in the gut, aiding in the breakdown of foods and boosting the immune system along with the production of neurotransmitters like serotonin and dopamine that keep you happy!

For more information on how to work with me and implementing GAPS protocol, please reach out for your free 15 minute consultation to see if GAPS is right for you! GAPS week long immersion training and retreats are now available.


Fuhmentaboudit! Episode 151 Wintery Ferments

We are huge fans of the heritage Food Radio Network and of the radio show Fuhmentaboudit! So when they called us up and wanted to have our Chief Fermentationist, brain child, and fearless leader Cheryl Paswater on the show, we of course said yes! Here she is talking about all things wintery and fermenty with host Chris Cuzme and co-producer Rachel Jacobs.

http://heritageradionetwork.org/podcast/winter-ferments-with-cheryl-paswater/

DIY : Sauerkraut 101

We've recently had a lot of inquiries about how to make Sauerkraut. So here is a basic DIY on making Sauerkraut from our Chief Fermentationist, Cheryl Paswater in conjunction with CoreNeeds NYC. They are an amazing organization that brings resources and awareness to families dealing with Autism. They are huge fans of the fermentation community and we are of them as well! 

http://coreneedsnyc.com/episode/sauerkraut-part-1/

Click the link above to check it out! They have other amazing resources on there as well, including some great food demos by our friend Jessica Van Kipp!