Microbes

Kefir Two Ways

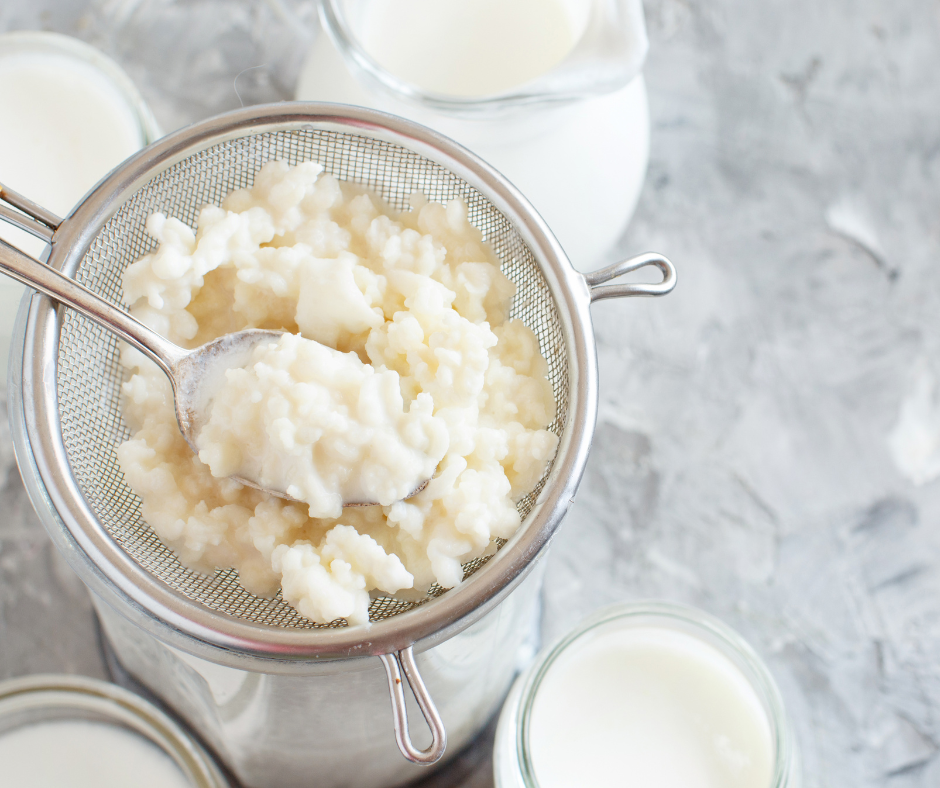
Kefir is hands down one of the best ferments for supporting the gut! While fermented dairy kefir is about 98% + lactose free some people still have a hard time digesting dairy. You’ll need to obtain Kefir Grains in order to make your kefir. We suggest ordering grains online from Cultures for Health or GEM Cultures .

With that in mind here is how we do Kefir both with dairy and without dairy! Make sure to read our notes at the end about keeping your grain cultures happy and healthy!

MILK KEFIR (DAIRY)

Ingredients

  • 1 tablespoon kefir grains

  • 8–16 ounces of milk (Goat or Cow: Organic, Non-Homogenized, and Raw are best.)

Instructions

  1. Add 1 tablespoon kefir grains to 8–16 ounces of raw milk in a jar with a lid. 

  2. Let it sit on the counter at room temperature for 24–72 hours depending on how sour you like it. You can taste it to check.

  3. Shake a couple times a day to keep fresh nutrients available to the grains.

  4. Strain the milk so you can keep the kefir grains to make a new batch.

  5. Put the strained kefir in a jar with a tight lid and keep it out of the fridge for a few hours. This will increase fizziness.

NOTE: The grains multiply. You can share them with friends or keep growing more. They work better if you keep them outside of the fridge. If you need to take time off from kefir, you can place them in some fresh milk and then put them in the fridge indefinitely. Once you are ready to use them again, rinse them off and begin the process from the beginning.

COCONUT KEFIR (NON-DAIRY)

Ingredients

  • 1 Tablespoon kefir grains

  • 8–16 ounces of full fat canned coconut milk or you can get young Thai coconuts and use the water and scrape the pulp and blend to make your own coconut milk

Instructions

  1. Use the same recipe for original milk kefir; just replace the dairy with coconut milk. 

NOTE: Make sure to put the grains in dairy milk every 2–3 batches to keep them happy and healthy.


Gluten Free Sourdough

FERMENTED SOURDOUGH BREAD

Ingredients

  • 3 cups whole buckwheat groats OR 3 cup mixed grain (we like equal parts buckwheat/millet/rice)

  • 1 tsp sea salt

  • 1 tbs chia seeds 

  • 2 tbs psyllium husk

  • coconut oil, ghee, or butter

  • sesame seeds, flax seed, pumpkin seeds, etc (optional for in the batter or sprinkled on top of the bread)

Instructions

  1. Rinse all grains, cover with water, and soak overnight in a large bowl. Cover with a towel. Soak for 8 hours or overnight.

  2. Combine grains with ¾ –1 cup of fresh water and sea salt and blend in food processor or  blender. Blend into a batter...it should be a loose toothpaste consistency. 

  3. Pour the batter into a bowl, cover with a clean dish cloth, and leave out at room temperature for approximately 24 -48 hours to ferment.

  Note: I like to mix the batter once around the 24 hour mark to mix in any hooch that 

might be on top of the batter. You’ll notice it because it will be darker than the batter…

almost a purplish color. Just mix it back in and let it rise again.

4. Preheat oven to 400F. Grease a loaf pan and then sprinkle a mix of seeds in the bottom of the pan. This helps the bread to not stick. 


5. Before you pour the batter into the  pan, add chia seeds and a couple tbs of any other seeds you want. I like my bread more seedy so I like to add flax meal, pumpkin & sunflower seeds, etc. Once the seeds are mixed in then pour the batter in the loaf pan and  place in the oven. 

6. Baking usually takes 45-60 minutes and how I like to tell it’s done is that its golden brown on top, usually the top of the bread is cracked, and if you stick a toothpick in it then it will come out clean.

7. Remove from oven and allow bread to cool for at least 1 hour before removing from pan. Once completely cool, slice bread and enjoy, either plain or toasted.

Boston Fermentation Festival 2018

See us here teaching at the 2018 Boston Fermentation Festival on Miso.

Miso Making with Cheryl Paswater In this short class we will cover the basic science behind making miso, why it is good for you and how to make it yourself. Miso is a traditional Japanese product produced by fermenting soybeans with salt and the fungus Aspergillus oryzae called Koji.

Embed Block
Add an embed URL or code. Learn more

Miso. Tempeh. Natto. And other Tasty Ferments! Out on Pre-order

We’re pretty excited about this gem coming out in 2019! This is the third book by our good friends Kirsten & Christopher Shockey and we’re super excited that you find some of our Miso recipes in this gem! Get those orders in!

Screen Shot 2018-10-18 at 11.51.03 AM.png

Berkshire Fermentation Festival Presenter Videos

What a lovely weekend at the Berkshire Fermentation Festival! This was our third year back teaching and we’re happy to announce that the videos from all the presenters are now up online for you to enjoy!

Catch our Miso Workshop along with presenters Sandor Katz, Adam Elabd, Amanda Feifer, Anne Yonetani, and Alana Chernila!!

CHECK IT OUT HERE!

From the 4th Annual Berkshire Fermentation Festival, Cheryl Paswater talks about making miso.

Hoshigaki

Hoshigaki are a Japanese delicacy made by gently massaging persimmons while they air dry.
The persimmons used to make Hoshigaki are astringent varieties such as Hachiya. Ideally, choose fruit that still has part of the stem. We've used a couple different varieties of persimmons with nice success.

1) The first step is to cut the top off, while carefully leaving the stem that you will tie string to and they will hang from. And then use a knife of peeler to trim away the skins of the persimmon. Then attach the string and find a good place for your Hosigaki to hang. Broom handles work great for this, we've also used knitting needles, drumsticks and hangers to hang the Hoshigaki from.


2) The first week you just let the Hoshigaki hang and dry till they start to create a thin skin.  After a week has passed you begin to gently massage each persimmon every other day. Be careful not to break the skin.

3) As you keep massaging every other day the fructose in the fruit will begin to come to the surface. The "bloom" begins to appear...it looks like powdered sugar on your persimmons. Keep massaging until the persimmons are more like a dried fruit, changing into a darker color with the bloom, and then enjoy!

Hoshigaki

Hoshigaki

Fermentation and the Human Microbiome Resource List

The First Annual NYC Fermentation Festival was a couple weekends ago here in Brooklyn, NY. It was a fantastic turnout and filled with amazing vendors, workshops, and more! Erin Cramm and I taught on Fermentation and the Human Microbiome this year at the festival and we wanted to share out list of favorite reads and more on this topic with you. So here are our picks and we hope you get a chance to enjoy them as much as we have!

Erin’s List:

I Contain Multitudes - Ed Yong

Food Rules - Michael Pollan

Gut - Giulia Enders

The Human Super-Organism - Dr. Rodney Dietert

Brainmaker - Dr. David Perlmutter

This is Your Brain on Parasites - Kathleen McAuliffe

The Gene - Siddhartha Mukherjee


Cheryl’s List:

The Art of Fermentation - Sandor Katz

Wild Fermentation - Sandor Katz

The Good Gut - Justin Sonnenburg

The Symbiont Factor - Dr. Richard Matthews

Cooked (Book & Netflix Series) - Michael Pollan

An Epidemic of Absence - Moses Velasques-Manoff

Missing Microbes - Dr. Martin J. Blaser